How to Harvest Honey: Complete Beekeeper's Guide
Everything you need to know about harvesting honey from your beehives — from knowing when frames are ready, to choosing the right extraction method, to bottling and storing your harvest.
Last updated:
Harvest honey when 80%+ of frame cells are capped (moisture below 18.6%), typically between late June and mid-September. Use a bee escape or fume board to clear bees, uncap cells with a heated knife, spin frames in an extractor or crush-and-strain, filter through a double sieve, settle 24-48 hours, then bottle in clean glass jars. Always leave 60-90 lbs for winter in northern climates.
🐝 World Bee Day 2026 — TODAY! 🐝
Today marks World Bee Day 2026, honoring Anton Janša's beekeeping legacy and celebrating global bee conservation. Sustainable honey harvest practices directly support bee health by leaving adequate winter stores and maintaining strong colonies. When we harvest wildflower honey, clover honey, or any variety responsibly, we ensure our bees thrive for generations — preserving both honey diversity and the pollination services essential to our food systems.
Every responsible harvest supports bee conservation. Every healthy hive strengthens our agricultural future.
When Is the Right Time to Harvest Honey?
Timing is the single most important factor in a successful honey harvest. In most of North America, the primary harvest window falls between late June and mid-September, depending on your region and local nectar flows. The general rule is to harvest after a major nectar flow has ended — when bees have stopped actively foraging on a particular bloom and have begun capping the honey cells with beeswax. A frame is ready to harvest when at least 80% of the cells are capped, which indicates the bees have reduced the moisture content below 18.6%. Harvesting uncapped honey risks fermentation because the water content is too high. Understanding variety-specific harvest timing helps optimize both yield and quality: <Link to="/honey/clover-honey" className="text-comb-800 underline hover:text-comb-600">clover honey</Link> typically reaches peak harvest in July, <Link to="/honey/wildflower-honey" className="text-comb-800 underline hover:text-comb-600">wildflower honey</Link> offers extended Apr-Sep availability, <Link to="/honey/buckwheat-honey" className="text-comb-800 underline hover:text-comb-600">buckwheat honey</Link> comes from late summer blooms, and <Link to="/honey/sourwood-honey" className="text-comb-800 underline hover:text-comb-600">sourwood honey</Link> requires precise Appalachian late-season timing. For first-year colonies, it is critical to leave enough honey for winter — in northern climates (USDA zones 3-5), bees need 60-90 pounds of honey to survive winter; in southern climates (zones 7-10), 30-40 pounds is typically sufficient. Never harvest all the honey from a hive, and avoid harvesting in late fall when bees have no time to rebuild stores. Spring harvests are possible in regions with early nectar flows (such as <Link to="/honey/orange-blossom-honey" className="text-comb-800 underline hover:text-comb-600">orange blossom honey</Link> in Florida or sourwood in Appalachia), but most beekeepers wait until summer or early fall. Check your local beekeeping association for nectar flow calendars specific to your region, as timing can vary by several weeks even within the same state.
Key Takeaways
- Primary harvest window: late June through mid-September in most of North America
- Frames are ready when 80%+ of cells are capped with beeswax (moisture below 18.6%)
- Northern climates: leave 60-90 lbs of honey for winter; southern: 30-40 lbs
- Never harvest all honey — bees need reserves to survive until the next nectar flow
- First-year colonies may not produce surplus honey — prioritize colony health over harvest
- Check local beekeeping associations for region-specific nectar flow calendars
What Equipment Do You Need to Harvest Honey?
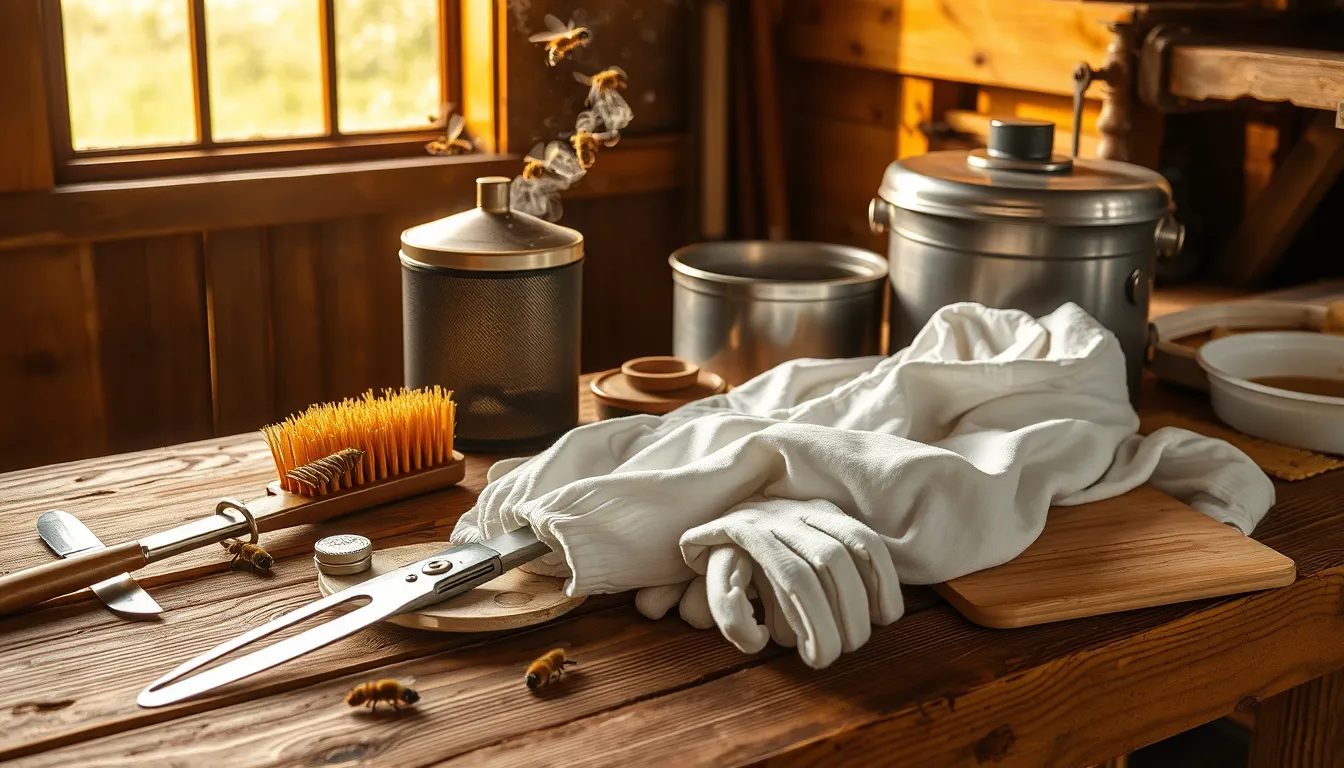
The equipment you need depends on your hive count and chosen extraction method. Every beekeeper needs a bee suit or jacket with veil and gloves, a smoker with fuel (burlap, pine needles, or cotton work well), and a hive tool for prying apart frames. For uncapping — the process of removing the wax caps from honeycomb cells — you will need either an uncapping knife (heated electric or cold serrated), an uncapping fork (also called a scratching tool) for missed cells, and an uncapping tub or tank to catch wax cappings. The central piece of equipment is the honey extractor, a centrifuge that spins honey out of the comb without destroying it so frames can be reused. Manual hand-crank extractors hold 2-4 frames and cost $150-$300, which is sufficient for 1-10 hives. Electric extractors hold 4-20+ frames and cost $400-$2,000+, making sense for larger operations. Many local beekeeping clubs have extractors available for members to borrow or rent. If you have just 1-3 hives, the crush-and-strain method requires no extractor at all — you simply cut the comb from the frame, crush it in a bucket, and strain through a mesh filter. You will also need a double sieve or nylon straining bag (200-400 micron) to filter wax particles, a food-grade bucket with a honey gate (spigot) for bottling, clean glass jars, and a refractometer (optional but recommended) to verify moisture content before bottling. All equipment that contacts honey should be food-grade stainless steel or plastic.
Key Takeaways
- Basic gear: bee suit/jacket, veil, gloves, smoker, hive tool — required for every harvest
- Uncapping tools: electric or serrated knife plus uncapping fork for missed cells
- Manual extractors (2-4 frames, $150-$300) work well for hobby beekeepers with 1-10 hives
- Many beekeeping clubs offer extractor loans or rentals — check before buying
- Crush-and-strain method needs no extractor — viable for 1-3 hive operations
- Refractometer recommended to verify moisture content is below 18.6% before bottling
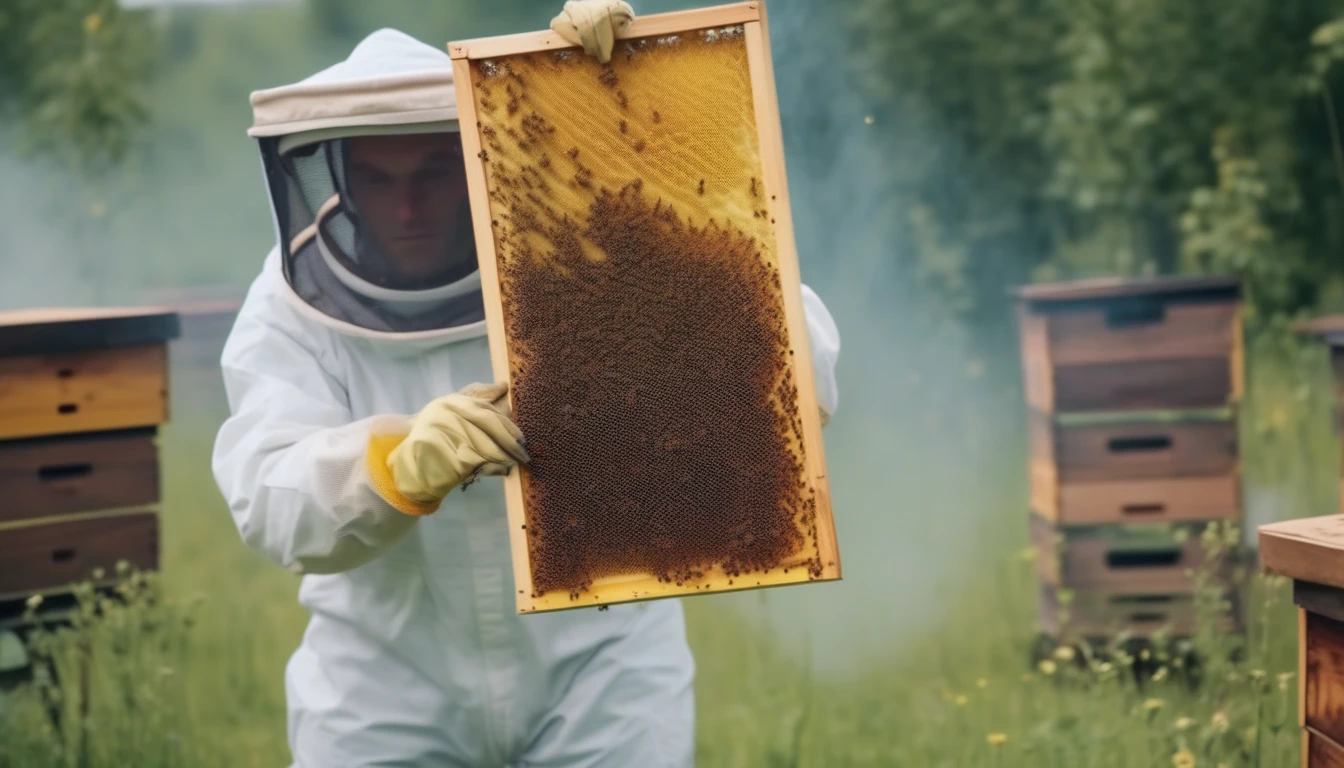
How Do You Safely Remove Bees from Honey Supers?
Before you can extract honey, you need to get the bees off the frames. There are four main methods, each with trade-offs. The bee escape board (also called a Porter bee escape or triangle escape) is the gentlest method: place it between the honey super and the brood box 24-48 hours before harvest. Bees move down through the one-way escape to be with the queen but cannot return to the super. This works best for small-scale beekeepers who can plan ahead. The fume board method uses a fabric-covered board treated with a bee-repellent liquid (such as Bee-Quick or Fischer's Bee-Quick, which use natural almond oil) placed on top of the super. On a warm day (above 75°F/24°C), bees evacuate the super within 5-10 minutes. Avoid benzaldehyde-based repellents, which can taint honey flavor. The brush-and-shake method is the most hands-on: remove each frame individually, give it a sharp downward shake to dislodge most bees, then gently brush off remaining bees with a soft bee brush. This method is slow but requires no special equipment. The leaf blower method (using a standard yard leaf blower on low setting) is fast and effective for multiple supers — hold each frame and blow bees back toward the hive entrance. Whichever method you choose, work during midday on a warm, sunny day when foragers are out, use your smoker sparingly (too much smoke can flavor the honey), and move removed supers away from the hive quickly to prevent robbing behavior.
Key Takeaways
- Bee escape boards: gentlest method — place 24-48 hours before harvest, bees move down naturally
- Fume boards with natural repellent (Bee-Quick): fastest — clears a super in 5-10 minutes
- Brush-and-shake: no special equipment needed — good for beginners with few frames
- Leaf blower method: fast for multiple supers — use low setting aimed toward hive entrance
- Work midday on warm sunny days when most foragers are out of the hive
- Use smoker sparingly — excessive smoke can taint honey flavor
How Do You Extract Honey from the Comb?
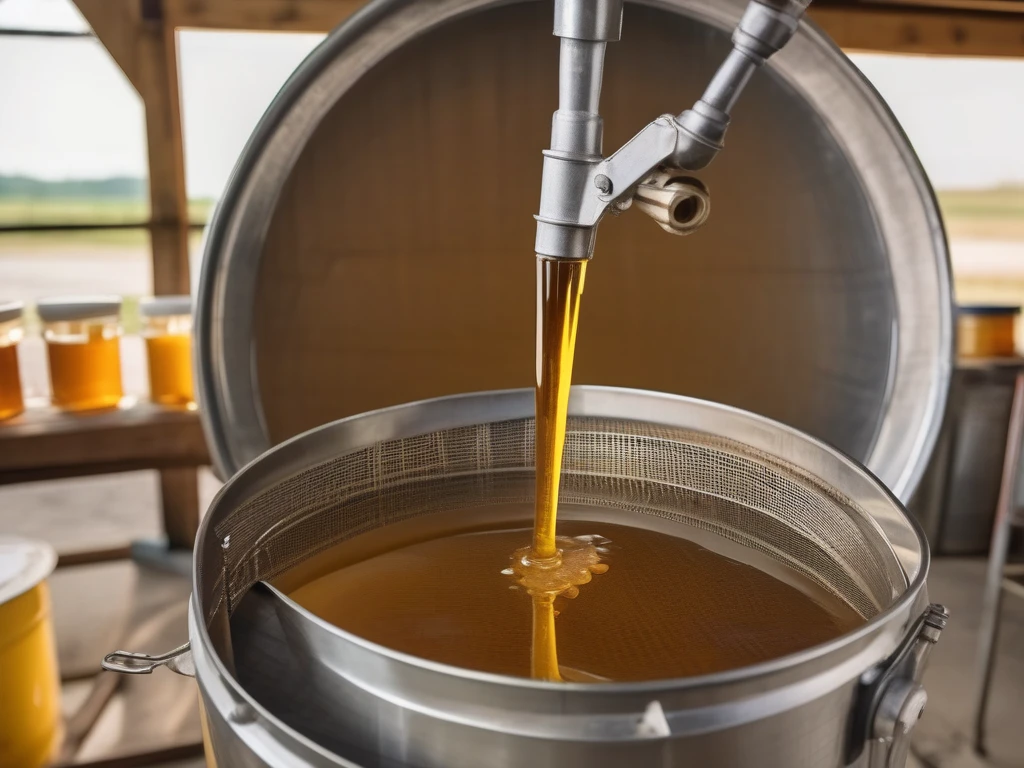
Extraction is the process of separating liquid honey from the beeswax comb. The most common method is centrifugal extraction. First, set up your extraction area in a clean, bee-proof indoor space — a kitchen, garage, or dedicated honey house works well. Use a warm room (80-90°F/27-32°C) as warm honey flows much more easily. Different honey varieties exhibit distinct extraction characteristics: <Link to="/honey/wildflower-honey" className="text-comb-800 underline hover:text-comb-600">wildflower honey</Link> typically flows well at moderate temperatures, <Link to="/honey/clover-honey" className="text-comb-800 underline hover:text-comb-600">clover honey</Link> offers reliable extraction with mild crystallization tendency, <Link to="/honey/buckwheat-honey" className="text-comb-800 underline hover:text-comb-600">buckwheat honey</Link> flows more slowly due to higher viscosity but rewards with rich flavor, and <Link to="/honey/acacia-honey" className="text-comb-800 underline hover:text-comb-600">acacia honey</Link> remains liquid longer than most varieties. Begin by uncapping: hold a frame vertically over an uncapping tub and slice the wax caps off both sides using a heated uncapping knife, working from top to bottom in a sawing motion. Use an uncapping fork to open any cells the knife missed. Place uncapped frames in the extractor, ensuring they are balanced (equal weight on opposite sides). For tangential extractors, start spinning slowly and gradually increase speed — spinning too fast initially can blow out fresh comb. Spin one side, flip the frames, spin the other side, then flip back and spin the first side again for complete extraction. Radial extractors extract both sides simultaneously and are faster. The honey collects at the bottom of the extractor and flows through the honey gate into a bucket fitted with a double sieve (coarse 600-micron mesh over fine 200-micron mesh) to remove wax particles, bee parts, and debris. For the crush-and-strain alternative, cut comb from frames into a food-grade bucket, crush thoroughly with a potato masher or clean hands, and let it strain through a paint strainer bag or nylon mesh overnight. This method is simpler but destroys the comb, so bees must rebuild it — which costs them approximately 8 pounds of honey to produce 1 pound of wax.
Key Takeaways
- Work in a warm room (80-90°F) — warm honey flows 2-3 times faster than cool honey
- Uncap with a heated knife from top to bottom, then fork any missed cells
- Start the extractor slowly to avoid blowing out fresh comb, then gradually increase speed
- Tangential extractors: spin one side, flip, spin other side, flip back for complete extraction
- Double-sieve filtering (600μ + 200μ) removes wax and debris without removing pollen or nutrients
- Crush-and-strain destroys comb — bees need ~8 lbs honey to rebuild 1 lb of wax
How Do You Process, Bottle, and Store Harvested Honey?
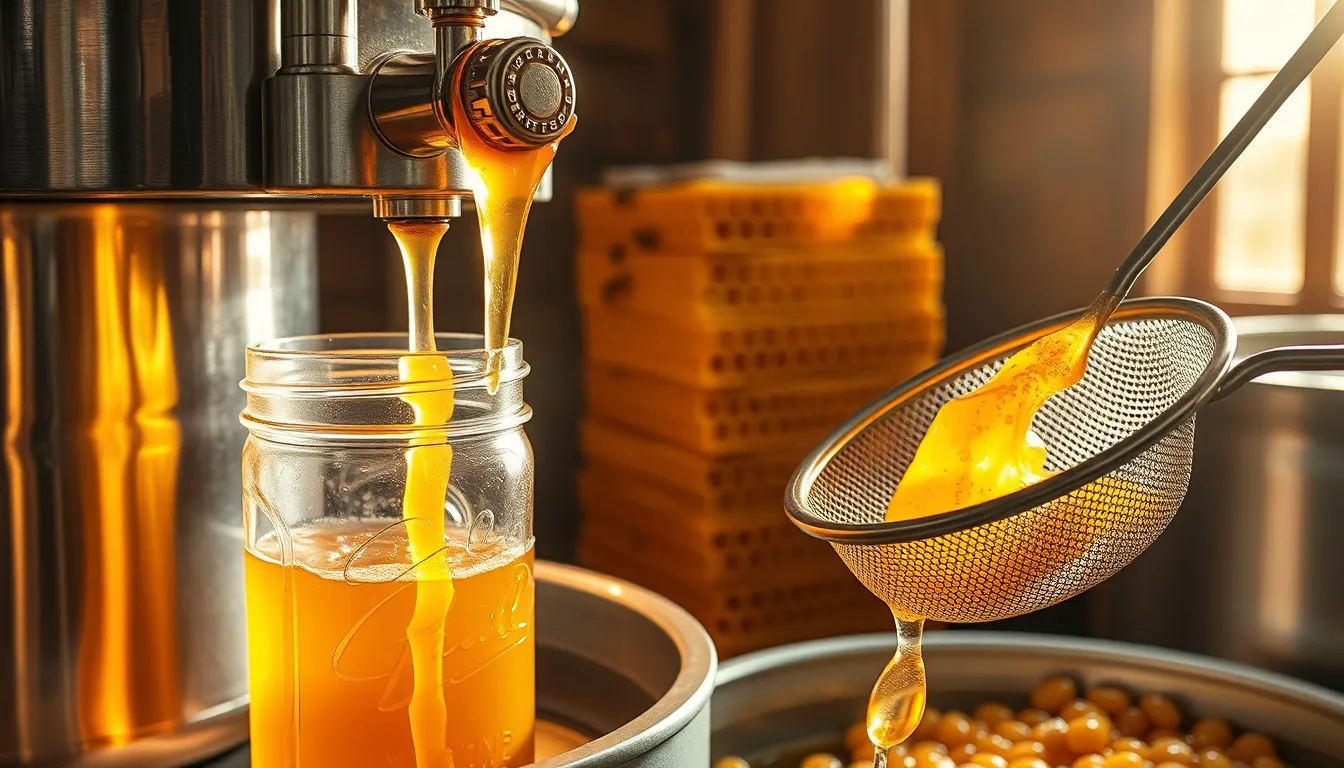
After extraction, proper processing ensures your honey stays fresh and high-quality. Let strained honey settle in a food-grade bucket with a honey gate for 24-48 hours. Air bubbles and any remaining fine wax particles will rise to the surface and form a foam layer that can be skimmed off. If you want to verify moisture content, use a refractometer — honey below 18.6% moisture is shelf-stable and will not ferment. If moisture is too high (above 20%), the honey may ferment over time; you can reduce moisture by placing uncapped frames in a warm, dehumidified room for 1-2 days before extracting. For bottling, use clean, dry glass jars (mason jars work well) or food-grade plastic containers. Fill jars slowly through the honey gate to minimize air bubbles, leaving about half an inch of headspace. Label your honey with the floral source when known — <Link to="/honey/wildflower-honey" className="text-comb-800 underline hover:text-comb-600">wildflower honey</Link> from diverse blooms, <Link to="/honey/clover-honey" className="text-comb-800 underline hover:text-comb-600">clover honey</Link> from agricultural areas, <Link to="/honey/buckwheat-honey" className="text-comb-800 underline hover:text-comb-600">buckwheat honey</Link> from late-season crops, or <Link to="/honey/orange-blossom-honey" className="text-comb-800 underline hover:text-comb-600">orange blossom honey</Link> from citrus groves — along with harvest date, your apiary name, and net weight. Understanding variety-specific characteristics helps with storage: <Link to="/honey/acacia-honey" className="text-comb-800 underline hover:text-comb-600">acacia honey</Link> resists crystallization for months, <Link to="/honey/wildflower-honey" className="text-comb-800 underline hover:text-comb-600">wildflower honey</Link> crystallizes moderately within weeks to months, and <Link to="/honey/buckwheat-honey" className="text-comb-800 underline hover:text-comb-600">buckwheat honey</Link> may crystallize more rapidly due to glucose content. For food-safe labeling in the United States, check your state's cottage food laws — most states allow small-scale beekeepers to sell honey with minimal regulation, but labeling requirements vary. Store honey at room temperature (64-75°F/18-24°C) in a dry location away from direct sunlight. Properly harvested and bottled honey has an essentially indefinite shelf life. Crystallization is natural and does not indicate spoilage — you can decrystallize by placing the jar in a warm water bath (not exceeding 110°F/43°C) to preserve enzymes and beneficial compounds. Save your beeswax cappings — rendered beeswax is valuable for candles, cosmetics, furniture polish, and food wraps.
Key Takeaways
- Let honey settle 24-48 hours — skim foam and fine wax from the surface before bottling
- Use a refractometer to verify moisture is below 18.6% for shelf stability
- Fill jars slowly through a honey gate to minimize air bubbles — leave ½ inch headspace
- Label with floral source, harvest date, apiary name, and net weight
- Check your state's cottage food laws before selling — labeling requirements vary by state
- Save beeswax cappings — valuable for candles, cosmetics, food wraps, and furniture polish
What Are Common Harvest Mistakes to Avoid?
Even experienced beekeepers make mistakes during honey harvest. The most damaging mistake is harvesting too much honey and leaving insufficient stores for winter — this is the leading cause of preventable colony loss. Always err on the side of leaving more than you think the bees need. Harvesting uncapped frames is the second most common error — if more than 20% of cells are uncapped, the honey likely has too much moisture and will ferment in the jar. You can test by holding a frame horizontally and giving it a sharp shake: if honey drips out freely, it is too wet. Extracting in an area that is not bee-proof will trigger robbing behavior — scout bees will find exposed honey within minutes and recruit the entire colony, creating a dangerous frenzy. Always extract indoors with windows and doors screened. Using dirty or contaminated equipment introduces off-flavors and can harbor bacteria or mold spores. Clean all equipment with hot water before and after use — never use soap or detergent on equipment that contacts honey, as residue will taint the flavor. Spinning the extractor too fast with new comb will blow out the fragile wax, wasting both comb and honey. Overheating honey during processing (above 110°F/43°C) destroys enzymes, kills beneficial yeasts, and degrades the delicate flavor compounds that make raw honey special — this is the difference between raw and commercial processed honey. Finally, not returning wet frames (extracted frames with a thin honey coating) to the hive is a missed opportunity — bees will clean them in 1-2 days, giving them a head start on refilling.
Key Takeaways
- Biggest mistake: taking too much honey — always leave more than you think bees need for winter
- Shake test for ripeness: if honey drips freely from a horizontal frame, it is too wet to harvest
- Always extract in a bee-proof indoor space — exposed honey triggers robbing within minutes
- Clean equipment with hot water only — never use soap or detergent (taints honey flavor)
- Spin extractor slowly with new comb — fast spinning blows out fragile wax
- Return wet frames to the hive — bees clean and reuse them, saving rebuilding effort
Related Honey Guides
Frequently Asked Questions
When should you harvest honey from a beehive?
Harvest honey when at least 80% of cells in a frame are capped with beeswax, which indicates moisture content is below 18.6%. In most of North America, the primary harvest window is late June through mid-September, after major nectar flows end. Timing varies by honey variety: clover honey typically peaks in July, wildflower honey offers extended Apr-Sep availability, buckwheat honey comes from late summer crops, and sourwood honey requires precise late-season timing in Appalachian regions. Always leave enough honey for winter — 60-90 pounds in northern climates, 30-40 pounds in southern climates.
How much honey can you harvest from one hive?
A healthy, established hive in a good nectar flow area can produce 30-60 pounds of surplus honey per year, with some exceptional colonies producing over 100 pounds. First-year colonies may produce little to no surplus as they are building comb and population. Always prioritize leaving enough stores for winter before harvesting any surplus.
Do you need an extractor to harvest honey?
No. Small-scale beekeepers with 1-3 hives can use the crush-and-strain method: cut comb from frames, crush it in a bucket, and strain through mesh. This is simpler but destroys the comb. For reusable comb and faster processing, a manual hand-crank extractor ($150-$300) is a good investment. Many beekeeping clubs also loan or rent extractors to members.
How do you get bees off honey frames before harvesting?
Four main methods: (1) Bee escape boards placed 24-48 hours before harvest let bees exit but not return. (2) Fume boards with natural repellent like Bee-Quick clear a super in 5-10 minutes. (3) Brush-and-shake each frame individually. (4) A leaf blower on low setting blows bees back toward the hive entrance. Work midday on warm days for best results.
How do you know if honey is ready to harvest?
Honey is ready when at least 80% of cells are capped with beeswax. You can also do the shake test: hold an uncapped frame horizontally and give it a sharp shake — if honey drips out freely, the moisture content is too high and it needs more time. A refractometer gives precise readings; moisture should be below 18.6% for shelf-stable honey.
What equipment do you need to harvest honey?
Essential equipment includes a bee suit or jacket with veil and gloves, smoker, hive tool, uncapping knife and fork, a honey extractor (or bucket and strainer for crush-and-strain), double sieve or straining bag (200-400 micron), food-grade bucket with honey gate, and clean glass jars for bottling. Different honey varieties benefit from specific handling: wildflower honey extracts easily at standard temperatures, clover honey offers reliable processing, buckwheat honey requires patience due to higher viscosity, and acacia honey flows well and resists early crystallization. A refractometer for testing moisture content is recommended but optional.
Edited by Sam French · Raw Honey Guide Editorial Team
Source reviewed against primary literature and official guidance where available. Health content is educational, not medical advice, and does not replace a licensed clinician.
Related Guides
Beekeeping Basics
Start your beekeeping journey.
Read GuideHow Bees Make Honey
The journey from flower to jar.
Read GuideHoneycomb Guide
How to eat honeycomb, benefits, and where to buy.
Read GuideRelated Articles
When Is Honey Harvest Season? A Complete Guide by Region
When is honey harvested? Harvest seasons by US region, how timing affects flavor and price, and the best time to buy.
Read ArticleBeekeeping for Beginners: How to Start Your First Hive in 2026
Start beekeeping in 2026 with this beginner guide. Equipment costs, hive types, where to buy bees, and first-year tips.
Read ArticleEating Honeycomb: Benefits, Taste, Safety, and How to Enjoy It
Yes, you can eat honeycomb — and it's packed with enzymes, propolis, and beeswax. Taste, benefits, 10 ways to enjoy it.
Read ArticleWant to learn more about beekeeping and honey production?