Why Honey Makes Better Granola Bars
Most store-bought granola bars use corn syrup, brown rice syrup, or tapioca syrup as the primary binder. These ingredients create a sticky matrix that holds oats together, but they add nothing nutritionally — just empty calories and a one-dimensional sweetness.
Honey is a superior binder for three reasons. First, its natural viscosity and hygroscopic properties (attracting and retaining moisture from the air) keep bars chewy for days instead of drying out and crumbling. Second, honey brings actual nutritional value — antioxidant polyphenols, trace minerals, and prebiotic oligosaccharides that corn syrup completely lacks. Third, depending on the variety, honey adds flavor complexity: floral notes from wildflower, caramel depth from buckwheat, or bright citrus from orange blossom.
The result is a granola bar that tastes better, stays fresh longer, and has a cleaner ingredient list than anything you will find in the store.
No-Bake Honey Granola Bars (Chewy)
This is the easiest method — 10 minutes of active work, no oven required. The bars set in the refrigerator and come out chewy and slightly soft, similar to a Chewy bar but with real ingredients.
- Line an 8x8-inch pan with parchment paper, leaving overhang on two sides
- Combine 2 cups rolled oats, 1/4 teaspoon salt, and dry mix-ins in a large bowl
- Warm 1/2 cup honey, 1/2 cup nut butter, and 1/3 cup melted coconut oil in a saucepan over low heat until smooth (about 2 minutes). Stir in 1 teaspoon vanilla
- Pour the wet mixture over the oats and stir until every oat is coated
- Press firmly into the prepared pan — use a spatula or the flat bottom of a measuring cup. Press hard; this is the most important step for bars that hold together
- Refrigerate for at least 2 hours, then cut into 12 bars
Pro Tip
The single most common reason homemade granola bars crumble is not pressing firmly enough. Spend 30 seconds really compacting the mixture into the pan. You want zero air pockets between the oats.

Baked Honey Granola Bars (Crispy)
If you prefer a crunchier, shelf-stable bar that does not need refrigeration, baking is the way to go. The oven drives off moisture and caramelizes the honey slightly, creating bars with a satisfying snap.
- Preheat oven to 325°F (163°C). Line an 8x8-inch pan with parchment paper
- Combine 2 cups rolled oats, 1/4 teaspoon salt, and dry mix-ins (nuts and seeds only — no chocolate) in a large bowl
- Warm 1/3 cup honey, 1/4 cup nut butter, and 2 tablespoons coconut oil until smooth. Stir in 1 teaspoon vanilla and optionally 1 tablespoon brown sugar for extra crunch
- Mix wet into dry until fully coated. Press firmly into the prepared pan
- Bake for 25-30 minutes until the edges turn golden brown. The center will still look soft — it firms up as it cools
- Cool completely in the pan (at least 1 hour) before cutting. Cutting too early = crumbled bars
Pro Tip
Use less honey and nut butter for baked bars than no-bake. Too much liquid fat and honey makes baked bars spread thin and become brittle. The ratios above are calibrated for bars that hold their shape after baking.
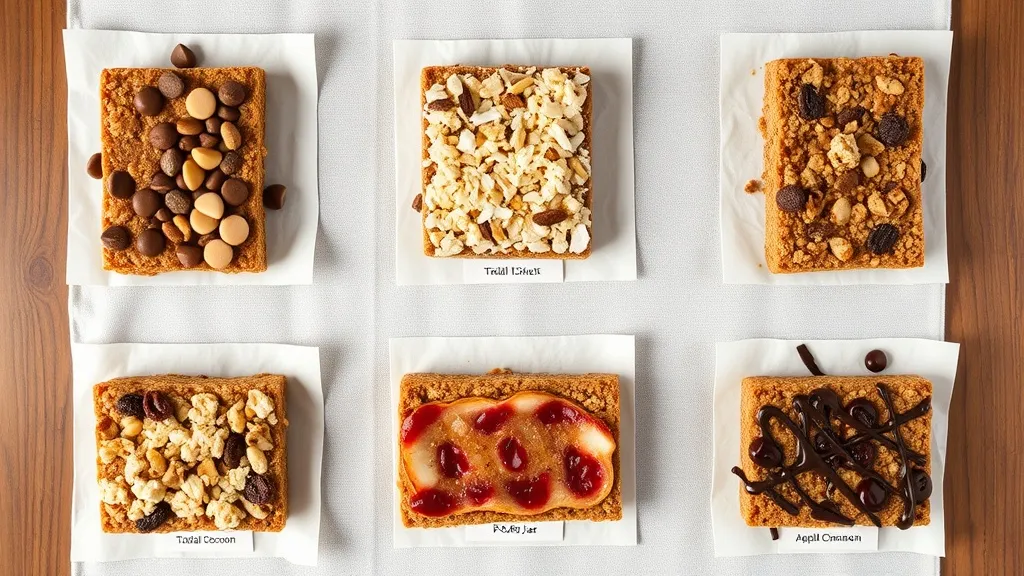
6 Flavor Variations
Start with either the no-bake or baked base recipe and swap in these mix-in combinations. Each uses 1/2 cup total mix-ins.
- Classic chocolate chip — 1/3 cup mini chocolate chips + 2 tablespoons flaxseed. Use clover honey for clean sweetness that lets the chocolate shine. Add chips after mixing for no-bake; add after baking for baked bars
- Trail mix — 2 tablespoons each of raisins, sunflower seeds, pumpkin seeds, and sliced almonds. Use wildflower honey for earthy depth. Works in both methods
- Tropical coconut — 1/4 cup unsweetened shredded coconut + 2 tablespoons dried mango (chopped) + 2 tablespoons macadamia nuts. Use orange blossom honey for citrus notes
- PB&J — Replace nut butter with peanut butter specifically, add 3 tablespoons freeze-dried strawberries (crushed). Drizzle 2 tablespoons strawberry jam on top after pressing into pan. No-bake only
- Apple cinnamon — 1/4 cup dried apple (chopped) + 2 tablespoons pecans + 1 teaspoon ground cinnamon mixed into the oats. Use buckwheat honey for caramel depth. Pairs with honey and cinnamon
- Dark chocolate cherry — 1/4 cup dried tart cherries + 2 tablespoons dark chocolate chips + 2 tablespoons almonds. Use acacia honey for mild sweetness that balances the tart cherries
Best Honey Varieties for Granola Bars
The honey flavor comes through in granola bars more than in most baked goods, so choose deliberately.
- Wildflower honey — our top pick. Complex floral notes complement oats and nuts without overpowering. Works with every mix-in combination
- Clover honey — mild, crowd-pleasing sweetness. Best when you want the other ingredients (chocolate, fruit, nuts) to be the star
- Buckwheat honey — bold, molasses-like richness that pairs beautifully with dark chocolate, warm spices, and dried fruit. Makes bars taste like they belong in an artisan bakery. Excellent antioxidant content
- Orange blossom honey — light citrus brightness for tropical and fruit-forward bars
- Avoid very strong honeys like eucalyptus or chestnut unless you specifically want their assertive flavor
Meal Prep and Storage
Homemade honey granola bars are ideal for weekly meal prep. Make a batch on Sunday and you have grab-and-go snacks all week.
- Room temperature (baked bars only): Airtight container for up to 1 week. Baked bars are shelf-stable because the moisture has been driven off
- Refrigerator (no-bake and baked): Airtight container for up to 2 weeks. No-bake bars must be refrigerated or they soften and lose shape
- Freezer (both methods): Individually wrap bars in parchment paper, place in a freezer bag, and freeze for up to 3 months. Thaw in the fridge overnight or at room temperature for 20 minutes
- For lunchboxes, wrap individual bars in parchment and secure with a small piece of tape. They will stay fresh all morning at room temperature
Pro Tip
Double the recipe and use a 9x13-inch pan for 24 bars. The extra effort is negligible and you get two weeks of snacks instead of one.
Customization Tips
Once you have the base ratio down (2 parts oats : 1 part honey-nut-butter mixture : dash of mix-ins), you can customize endlessly.
- Make them higher protein: Add 2 scoops unflavored protein powder to the dry mix. Increase honey by 1 tablespoon to compensate for the extra dry ingredient
- Make them nut-free: Replace nut butter with sunflower seed butter or tahini. Replace any nut mix-ins with seeds (pumpkin, sunflower, hemp hearts)
- Make them lower sugar: Reduce honey to 1/3 cup and add 1 mashed ripe banana to compensate for binding. The bars will be softer
- Add crunch: Toast the oats in a dry skillet for 3-4 minutes before mixing. This adds a nutty depth that raw oats lack
- Add chew: Mix in 2 tablespoons of honey directly into the oats before adding the warmed mixture. The extra honey creates pockets of chewiness
Homemade vs Store-Bought Comparison
Here is how a homemade honey granola bar stacks up against a typical store-bought chewy granola bar.
A standard store-bought bar contains 10-15 ingredients including corn syrup, sugar, brown rice syrup, soy lecithin, natural flavors, and BHT. A homemade honey bar uses 6-7 ingredients, all recognizable. The calorie count is similar (around 140-180 per bar), but the nutritional quality differs significantly: honey provides antioxidant polyphenols and prebiotic fiber, while corn syrup provides none.
The cost comparison favors homemade as well. A batch of 12 bars costs approximately $4-6 in ingredients (oats, honey, nut butter, coconut oil, mix-ins). A box of 12 store-bought bars runs $4-7 but with inferior ingredients. When you factor in the health benefits of raw honey, homemade wins decisively.