Why Honey Makes Better Dinner Rolls
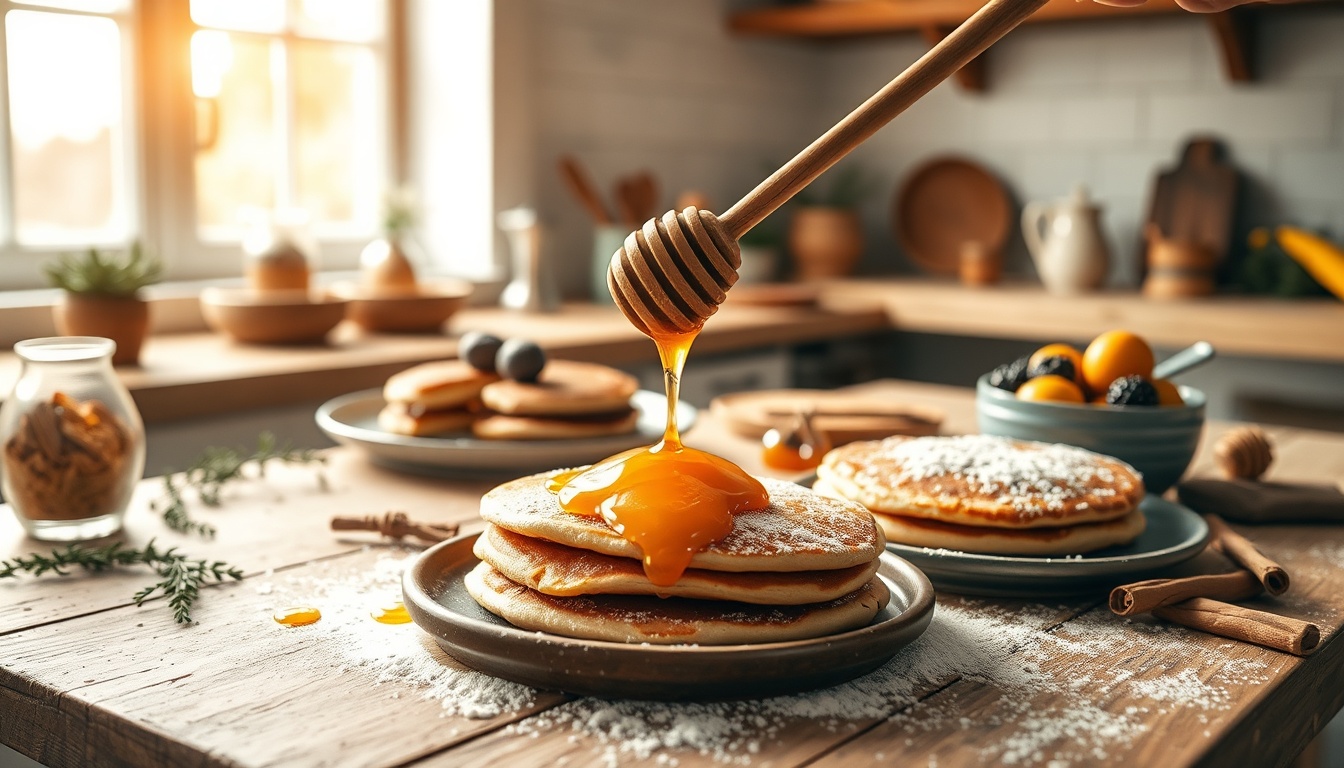
Swap granulated sugar for honey in a dinner roll recipe and you get a fundamentally different result — softer crumb, deeper color, longer freshness, and a complexity of flavor that sugar cannot replicate. The reasons are rooted in chemistry, not tradition.
Honey is hygroscopic, meaning it actively pulls moisture from the surrounding air and locks it into the crumb. A batch of honey rolls left on the counter overnight stays pillowy soft while sugar-based rolls begin to stiffen. This moisture-retention effect is especially valuable for make-ahead holiday baking, where rolls may sit for hours between baking and serving.
Color and crust come down to fructose. Honey is roughly 38-40% fructose, which caramelizes at around 230°F — nearly 100 degrees lower than sucrose. That lower threshold means honey rolls develop a rich, golden-brown exterior at standard baking temperatures without needing an egg wash or extra time in the oven. The Maillard reaction between those sugars and the dough's amino acids produces dozens of additional flavor compounds in the crust.
Yeast performance also benefits from honey. Active dry yeast can metabolize the simple sugars in honey — fructose and glucose — directly, without first needing to produce the enzyme invertase to break down sucrose into usable components. The result is a slightly faster, more vigorous initial fermentation. Combined with honey's 180+ aromatic compounds — floral esters, organic acids, and trace volatiles that vary by honey variety — the finished rolls have a layered sweetness that tastes like more than the sum of their ingredients.
The Science of Soft Rolls
A truly soft dinner roll depends on four factors working together: fat distribution, protein structure, sugar chemistry, and hydration. Understanding each one helps you troubleshoot and adapt the recipe confidently.
Whole milk provides both water for gluten development and milk fat that coats individual gluten strands. Those fat-coated strands slide past each other more easily, producing a tender crumb that tears apart in soft layers instead of snapping. This is why enriched doughs — those containing dairy, eggs, and butter — yield softer bread than lean doughs made with just flour, water, yeast, and salt.
The egg in this recipe contributes lecithin, a natural emulsifier that helps fat and water mix evenly throughout the dough. Egg proteins also set during baking, reinforcing the roll's structure so it holds its domed shape rather than collapsing. The yolk adds a faint golden color to the interior crumb.
Honey's mild acidity (pH around 3.5-4.5) has a subtle but measurable effect on the gluten network. A slightly acidic environment tightens and strengthens gluten bonds, giving the dough enough structure to trap gas during fermentation while remaining extensible enough to expand freely. This balance between strength and stretch is what separates a roll that is airy and tall from one that is flat or dense.
Butter temperature matters more than most recipes acknowledge. Softened butter — around 65-68°F — incorporates into the dough evenly, distributing fat throughout the gluten network in thin layers. Melted butter, by contrast, coats flour particles before gluten can develop, which can produce a shorter, more cake-like crumb. For the pillowy pull-apart texture this recipe targets, softened butter is the right choice.
Step-by-Step Recipe: Honey Butter Rolls
**Step 1: Bloom the yeast.** In a large mixing bowl, warm the milk to 105-110°F — it should feel comfortably warm against your wrist, not hot. Stir in 2 tablespoons of the honey until dissolved, then sprinkle the yeast over the surface. Let it sit undisturbed for 5-10 minutes. You should see a foamy, bubbly raft form on top. If nothing happens after 10 minutes, the yeast is dead — discard and start over with fresh yeast and slightly cooler milk.
**Step 2: Mix the dough.** Add the remaining 2 tablespoons honey, softened butter, egg, and salt to the yeast mixture. Stir until the butter is mostly incorporated — a few small lumps are fine at this stage. Add 2 cups of the bread flour and stir vigorously until a shaggy, sticky mass forms. Add the remaining flour about 1/4 cup at a time, mixing after each addition, until the dough pulls cleanly away from the sides of the bowl. You may not need all 3 1/4 cups — stop when the dough is slightly tacky to the touch but no longer sticks to your fingers.
**Step 3: Knead until smooth.** Turn the dough onto a lightly floured surface and knead for 8-10 minutes by hand. Push the dough away with the heel of your palm, fold it back over itself, rotate a quarter turn, and repeat. The dough will start shaggy and rough but should become smooth, elastic, and slightly springy. Test it: poke the dough with a fingertip and it should slowly spring back. If using a stand mixer, use the dough hook on medium-low (speed 2) for 6-7 minutes. Avoid adding extra flour during kneading — a slightly tacky dough makes softer rolls than a stiff one.
**Step 4: First rise (1 hour).** Shape the dough into a ball and place it in a lightly oiled bowl, turning once to coat. Cover tightly with plastic wrap or a damp kitchen towel. Set in a warm spot — 75-80°F is ideal. If your kitchen is cool, place the bowl inside your oven with just the light on, or set it on top of the refrigerator. Let rise for about 1 hour until doubled in volume. To test, press two fingers about half an inch into the dough. If the indentations hold and don't spring back, the dough is ready.
**Step 5: Shape the rolls.** Turn the risen dough onto a clean, unfloured work surface. Divide it into 12 equal portions — a kitchen scale helps here, aiming for about 60-65g each. To shape each roll, cup your hand loosely over a portion and roll it in a circular motion against the counter, tucking the edges underneath to create surface tension. You should end up with a smooth, taut ball. Place the balls in a greased 9x13-inch baking pan, spacing them about 1/2 inch apart so they grow together during the second rise for a pull-apart effect.
**Step 6: Second rise (30 minutes).** Cover the pan loosely with plastic wrap or a towel and let the rolls rise for 30-40 minutes until puffy, nearly doubled, and the edges of neighboring rolls are just touching. Don't rush this step — under-proofed rolls will be dense in the center.
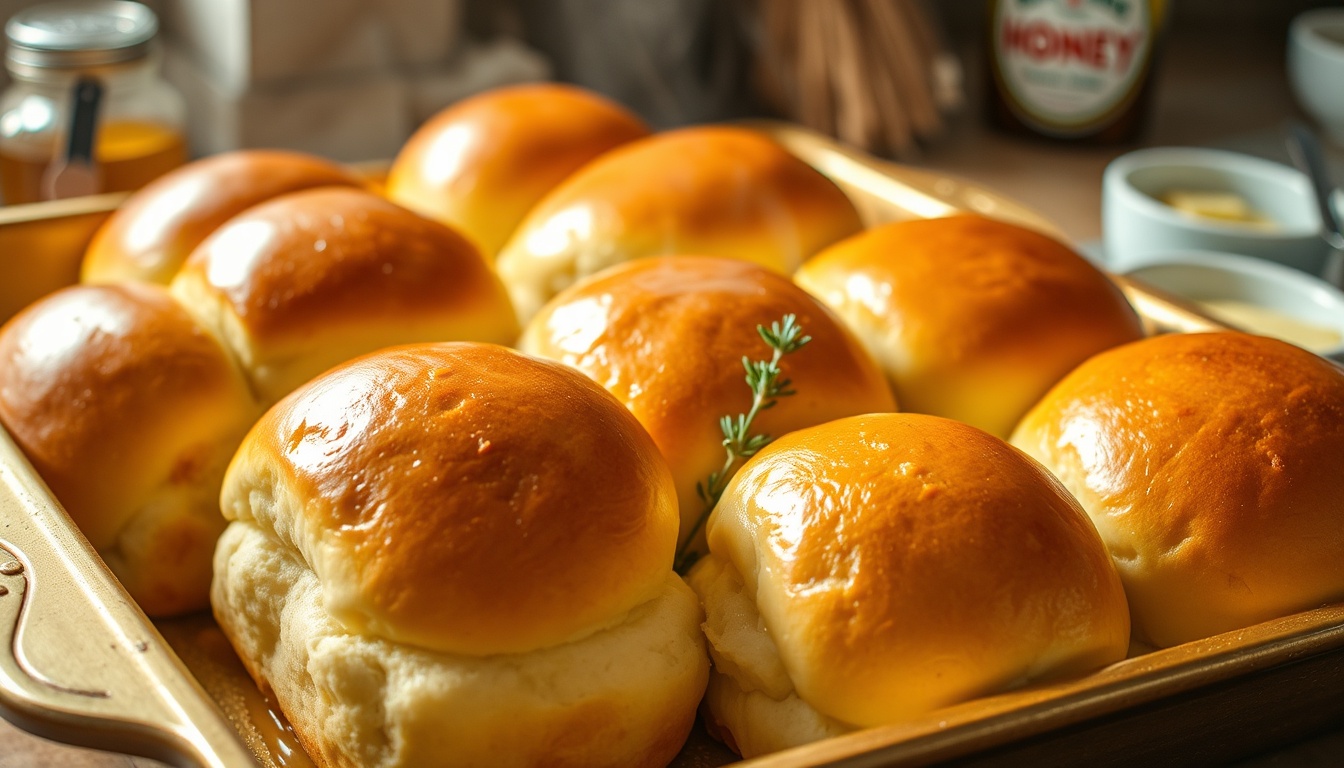
**Step 7: Bake.** Preheat your oven to 375°F (190°C) during the last 10 minutes of the second rise. Bake the rolls on the center rack for 18-22 minutes, until the tops are deep golden brown. The internal temperature should read 190°F on an instant-read thermometer. If the tops brown too quickly, tent loosely with aluminum foil for the last 5 minutes.
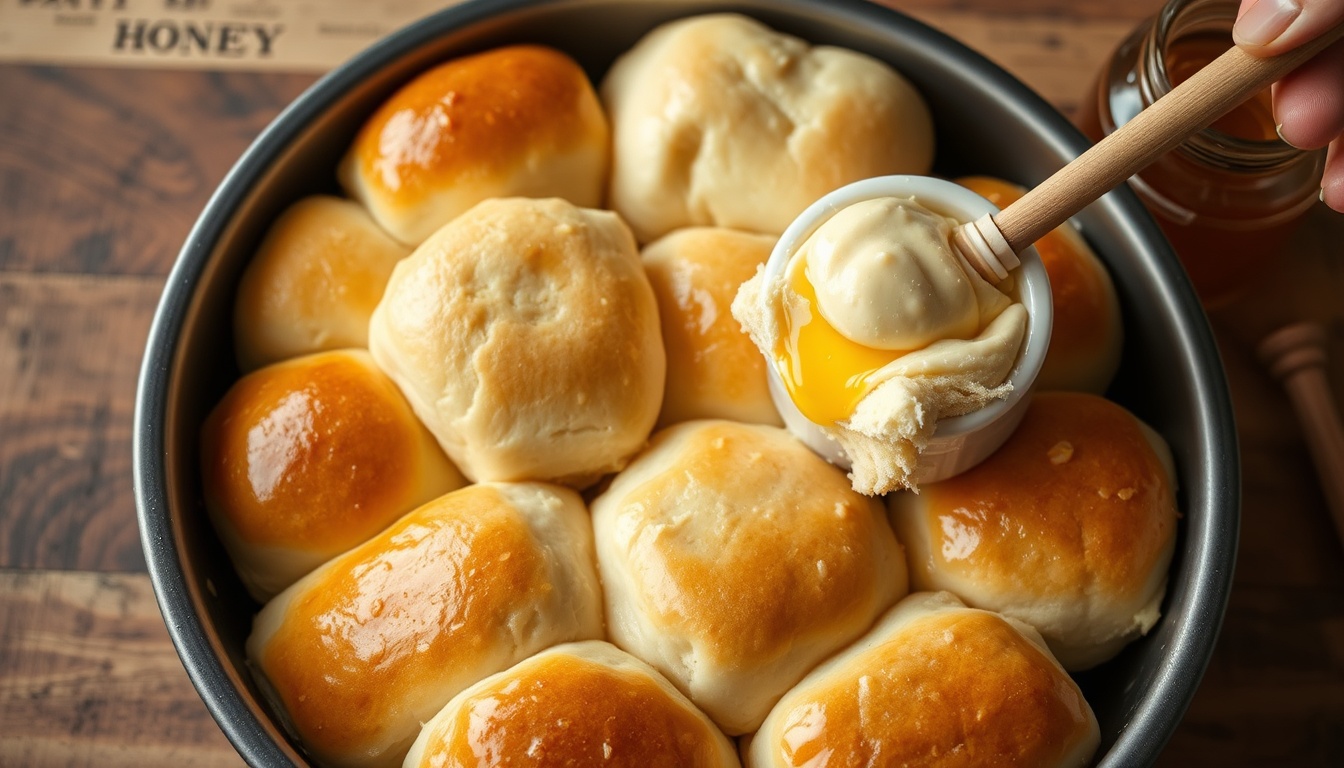
**Step 8: Glaze with honey butter.** While the rolls bake, melt 2 tablespoons of butter and stir in 1 tablespoon of honey until smooth. The moment the rolls come out of the oven, brush this honey-butter glaze generously over the tops. The hot rolls absorb the glaze, creating a glossy, slightly sticky, irresistible finish. Let the rolls cool in the pan for 5-10 minutes before serving — they pull apart beautifully while still warm.
Pro Tip
Shaping rolls on an unfloured surface gives you better grip. The slight friction between the dough and the counter helps you create surface tension, which is what makes the rolls rise upward into a dome instead of spreading flat. If the dough sticks, lightly oil the counter — but avoid flour, which dries the surface and prevents a tight seal.
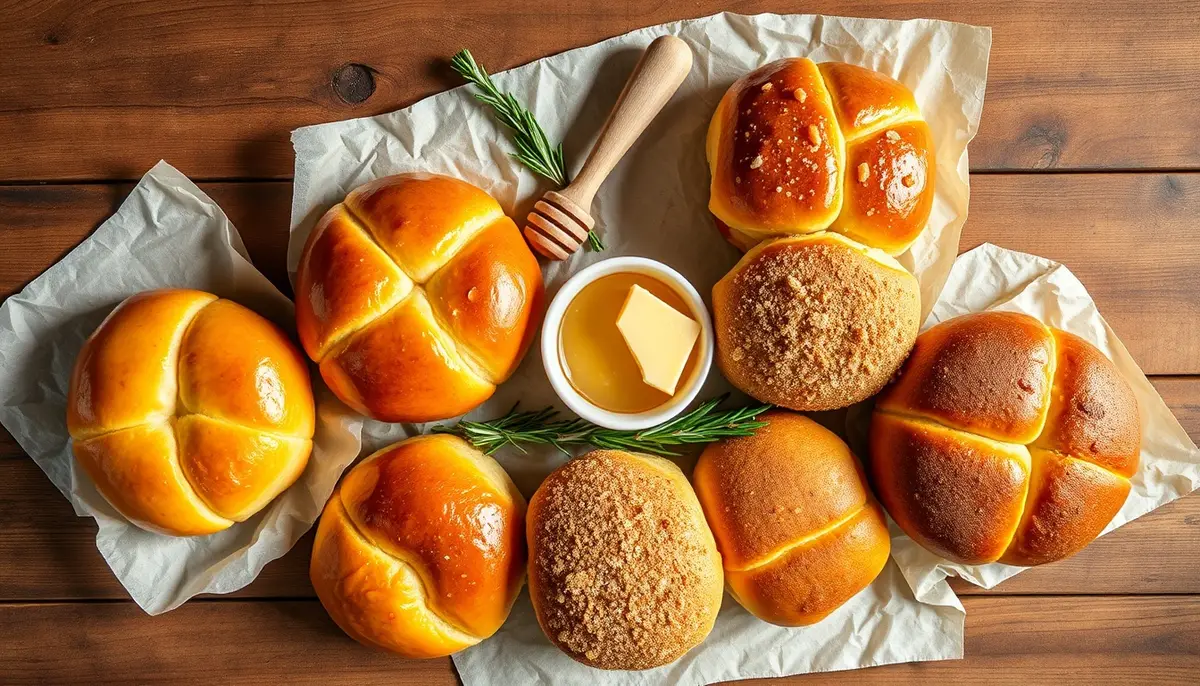
5 Flavor Variations
**1. Garlic Parmesan Honey Rolls.** Replace the honey-butter glaze with garlic butter: melt 3 tablespoons butter with 2 minced garlic cloves over low heat for 1-2 minutes (don't let the garlic brown). Brush the rolls immediately after baking, then sprinkle generously with 1/3 cup finely grated Parmesan and a pinch of dried Italian herbs. The honey in the dough provides a subtle sweetness that balances the savory garlic and salty cheese beautifully. Perfect alongside pasta or a big salad.
**2. Cinnamon Sugar Honey Rolls.** Before shaping, roll each dough ball in a mixture of 1/4 cup granulated sugar and 1 1/2 teaspoons ground cinnamon. After baking, brush with the standard honey-butter glaze. The sugar coating caramelizes slightly in the oven, creating a lightly crunchy exterior around the soft interior. A natural match for honey and cinnamon — serve these at brunch with coffee.
**3. Pull-Apart Honey Rolls (Round Pan).** Instead of a 9x13 pan, arrange all 12 rolls in a greased 10-inch round cake pan or cast iron skillet. The tighter arrangement forces the rolls upward as they proof and bake, producing taller, fluffier rolls with soft sides on all edges. This presentation also makes a striking centerpiece for a holiday table — set the whole pan down and let guests pull.
**4. Honey Slider Buns.** After the first rise, divide the dough into 16 smaller portions instead of 12 (about 45-50g each). Shape and arrange in a greased 9x13 pan. Bake at 375°F for 15-18 minutes — the smaller size means a shorter bake. After cooling, slice in half horizontally and use as slider buns for pulled pork, ham and cheese, or honey BBQ chicken. The slight sweetness of the bun makes any slider taste more polished.
**5. Whole Wheat Honey Rolls.** Replace 1 cup of the bread flour with whole wheat flour. Add 1 extra tablespoon of honey to the dough to offset the slight bitterness of whole wheat. These rolls will be a bit denser and chewier — knead an extra 2 minutes to fully develop the gluten in the whole wheat flour. Pair with buckwheat honey for the glaze, whose malty depth complements the nuttiness of whole wheat. Excellent alongside soups and stews.
Best Honey Varieties for Rolls
The type of honey you choose affects both flavor and browning. Here are the best options for dinner rolls, each producing a distinctly different result.
- **Clover honey** — The classic all-purpose choice. Clean, mild sweetness that enhances the buttery dough without competing with it. Produces a light golden crust. Best for: everyday dinner rolls, holiday tables, and any time you want the butter and bread flavors to stay front and center.
- **Wildflower honey** — Slightly more complex than clover, with floral and herbal undertones that vary by region and season. Adds subtle depth to the crumb. Best for: when you want a hint of something interesting without committing to a strongly flavored honey.
- **Orange blossom honey** — Delicate citrus-floral notes that brighten the rolls with an almost perfumed sweetness. Pairs especially well with the garlic Parmesan variation, where the citrus note contrasts the savory elements. Best for: spring and summer meals, seafood dinners, brunch spreads.
- **Buckwheat honey** — Dark, malty, and robust with molasses-like character. Creates deeply browned rolls with a more assertive flavor. Best for: whole wheat honey rolls, hearty fall and winter dinners, pairing with sharp cheeses and charcuterie.
- **Acacia honey** — The most delicate option. Very light in color and flavor with almost no aftertaste. Lets the butter and bread flour flavors dominate completely. Best for: when you want the structural benefits of honey (moisture, browning, yeast feeding) with minimal flavor impact.
Pro Tip
For a side-by-side comparison, bake one batch with clover and another with buckwheat — the difference in color, aroma, and flavor is striking. The buckwheat rolls will be visibly darker with a more complex, almost savory quality.
Tips for Perfect Rolls Every Time
Dinner rolls seem simple, but a few details make the difference between good and exceptional.
- **Check your yeast temperature.** Active dry yeast activates best between 105-110°F. Below 95°F, fermentation is sluggish. Above 120°F, the yeast cells begin to die. Use an instant-read thermometer — guessing leads to inconsistent results. If you use instant yeast instead of active dry, you can mix it directly into the flour without blooming, and the water temperature can be slightly warmer (up to 120°F).
- **Resist the urge to add extra flour.** The most common mistake in roll-making is adding too much flour during kneading. A tacky dough feels less comfortable to work with, but it bakes up softer. If the dough is truly unmanageable, add flour one teaspoon at a time. A bench scraper helps you work with wet doughs without adding flour at all.
- **Use the poke test for rise readiness.** Press two floured fingertips about half an inch into the risen dough. If the indentations spring back slowly and partially — leaving a shallow dent — the dough is perfectly proofed. If they spring back immediately, the dough needs more time. If they don't spring back at all, the dough is over-proofed; gently punch it down and reshape.
- **Space the rolls correctly.** For pull-apart rolls with soft sides, place them 1/2 inch apart so they merge during the second rise. For rolls with a slight crust on all sides, space them 1-2 inches apart on a sheet pan instead. Both are delicious — it depends on whether you prefer soft edges or a bit of crisp.
- **Brush the glaze while the rolls are hot.** The honey-butter glaze should go on within 30 seconds of the pan leaving the oven. Hot rolls absorb the glaze into the crust, creating a flavor that penetrates rather than just sitting on the surface. If the rolls cool first, the glaze stays on top as a coating — pleasant, but not the same.
- **Don't skip the kitchen scale.** Dividing dough by eye produces uneven rolls that bake at different rates — the small ones overbake while the large ones stay doughy in the center. A kitchen scale takes 30 seconds and guarantees uniformity.
Make-Ahead and Freezing Guide
Dinner rolls are a prime candidate for advance preparation. Whether you want to split the work across two days or stock the freezer for future dinners, these methods preserve the quality of freshly baked rolls.
**Overnight dough method.** Complete the recipe through Step 4 (first rise). After the dough has doubled, punch it down, cover the bowl tightly with plastic wrap, and refrigerate for 8-24 hours. The cold slows fermentation dramatically but doesn't stop it, allowing flavor to develop. When ready to bake, remove the dough from the fridge, shape the rolls, and let them proof at room temperature for 45-60 minutes (they'll need longer because the dough is cold). Bake as directed.
**Par-bake method.** This is the professional bakery technique for always-fresh rolls. Bake the rolls at 375°F for only 12-14 minutes — until set and very lightly colored but not golden. Cool completely, then wrap tightly and freeze for up to 2 months. To finish, place frozen par-baked rolls on a sheet pan and bake at 375°F for 8-10 minutes until golden and heated through. The result is virtually indistinguishable from rolls baked fresh.
**Freeze fully baked rolls.** Cool rolls completely, then place in a single layer in a freezer bag, pressing out as much air as possible. Freeze for up to 3 months. To reheat, wrap rolls loosely in aluminum foil and warm at 325°F for 10-12 minutes. A light brush of fresh honey butter after reheating restores the glossy finish.
**Freeze shaped, unbaked dough.** Shape the rolls and arrange on a parchment-lined sheet pan. Freeze until solid (about 2 hours), then transfer to a freezer bag. When ready to bake, place frozen dough balls in a greased pan, cover, and let thaw and rise at room temperature for 2-3 hours (or overnight in the refrigerator). Bake as directed once the rolls are puffy and touching.
Pro Tip
The par-bake method is the best option for holidays. Do all the mixing, rising, shaping, and partial baking days or weeks in advance. On the day of the meal, the final 8-10 minute bake fills the kitchen with the smell of fresh bread with almost zero effort.