Why Honey Garlic Cauliflower Is So Addictive
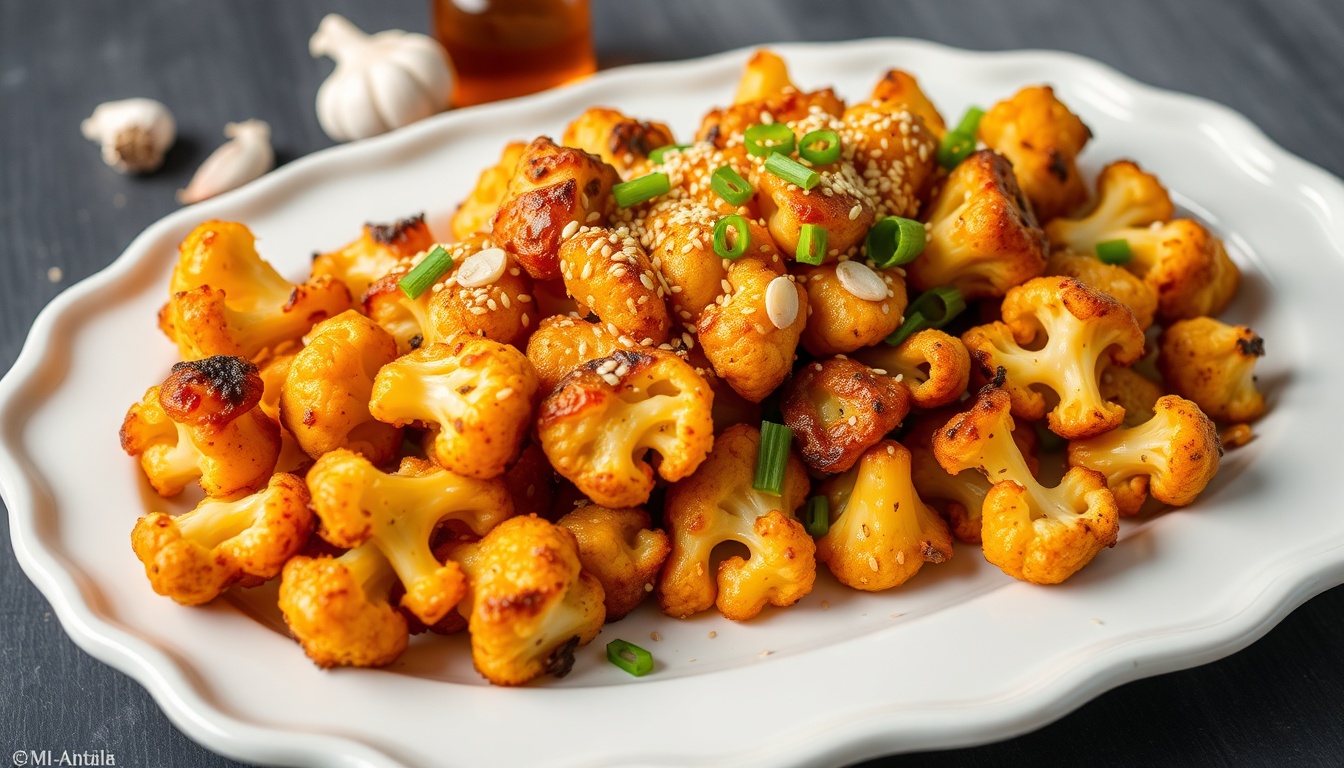
Honey garlic cauliflower proves that plant-based food can be just as crave-worthy as any meat dish. The secret is the two-step cooking method: first you roast the cauliflower at high heat until the edges caramelize and turn golden, then you toss it in a sticky honey-garlic sauce that clings to every crevice and crater of the florets.
Cauliflower is the ideal vegetable for this treatment. Its neutral flavor absorbs sauces completely, and its irregular surface — all those bumps and ridges — creates maximum surface area for the honey garlic glaze to grip. The floret tips get crispy in the oven while the interior stays tender, giving you textural contrast in every bite.
Unlike honey garlic chicken or honey garlic shrimp, this recipe is naturally plant-based (and can be made vegan by swapping the honey for a plant-based sweetener, though we obviously recommend the real thing). The fructose in honey caramelizes at 230°F — well below cauliflower's roasting temperature — which means the glaze develops deep color and complex flavor on contact.
Ingredients
Simple pantry ingredients for 4 servings as a side dish or 2 as a main.
- **Cauliflower:** 1 large head (about 2 pounds), cut into bite-sized florets — look for tight, compact heads with no brown spots
- **Raw honey:** 3 tablespoons (65g) — the glazing star; wildflower or clover both work well
- **Soy sauce:** 2 tablespoons — low-sodium recommended; provides umami and salt
- **Garlic:** 5 cloves, minced — generous garlic is essential
- **Rice vinegar:** 1 tablespoon — brightens the glaze and balances sweetness
- **Sesame oil:** 1 teaspoon — toasted sesame oil for nutty aroma
- **Cornstarch:** 2 tablespoons — tossed with florets before roasting for extra crispiness
- **Neutral oil:** 2 tablespoons (avocado or vegetable) — for coating the florets
- **Sriracha or chili flakes:** 1/2 teaspoon (optional) — gentle heat accent
- **Sesame seeds and sliced scallions:** for garnish
Best Honey Varieties for Cauliflower
The honey variety you choose will subtly shift the final flavor of the glaze.
- **Wildflower honey:** Best all-around choice — balanced sweetness with enough floral complexity to complement the garlic
- **Clover honey:** Clean, mild sweetness that puts the garlic center stage
- **Orange blossom honey:** Adds a delicate citrus note that brightens the whole dish
- **Buckwheat honey:** Bold and malty — creates a deeply caramelized, almost barbecue-like glaze for an adventurous twist
- **Acacia honey:** Very mild and clean — lets the garlic and soy sauce flavors dominate
Pro Tip
For the crispiest results, use a lighter honey (clover, acacia, wildflower). Darker honeys like buckwheat caramelize faster and can burn at higher oven temperatures if you're not watching carefully.
Step-by-Step Instructions
**Step 1: Prep and preheat.** Preheat oven to 425°F with a rack in the center position. Line a large baking sheet with parchment paper. Cut cauliflower into uniform bite-sized florets — even sizing ensures even roasting.
**Step 2: Coat the florets.** Toss cauliflower florets with neutral oil and cornstarch in a large bowl until every piece is lightly and evenly coated. The cornstarch creates a thin barrier that crisps up in the oven and helps the glaze stick later.
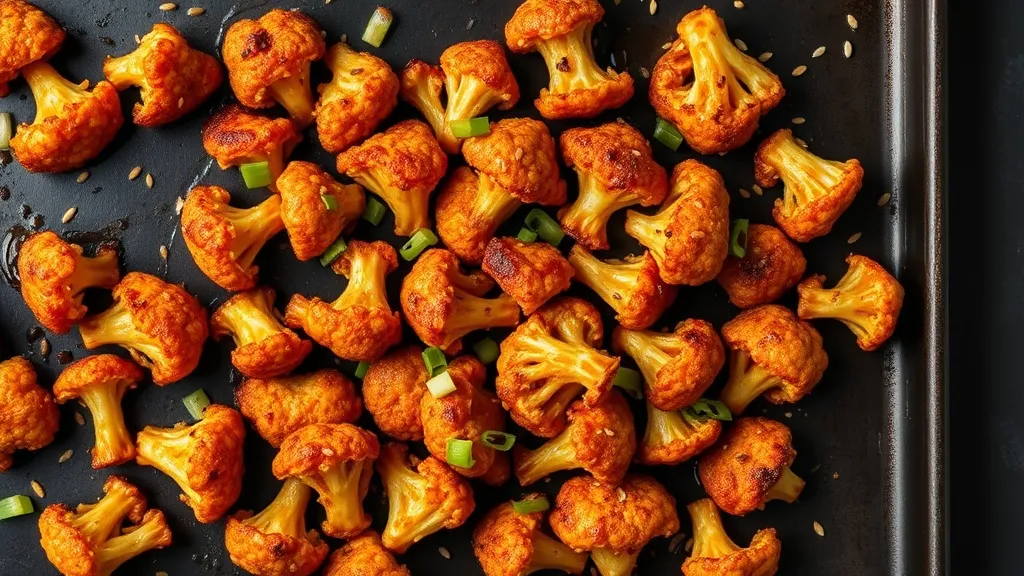
**Step 3: Roast until crispy.** Spread coated florets in a single layer on the baking sheet — don't crowd them, as overlapping pieces steam instead of roast. Bake for 25-30 minutes, flipping halfway through, until the edges are golden brown and crispy.
**Step 4: Make the glaze.** While cauliflower roasts, whisk together honey, soy sauce, minced garlic, rice vinegar, sesame oil, and optional sriracha in a small saucepan. Bring to a gentle simmer over medium heat, stirring occasionally, for 2-3 minutes until slightly thickened and fragrant.
**Step 5: Toss and serve.** Transfer the hot roasted cauliflower to a large bowl. Pour the warm honey garlic glaze over the top and toss gently but thoroughly until every floret is coated. The heat from both the cauliflower and the glaze helps the sauce bond to the crispy surface.
**Step 6: Garnish and serve.** Transfer to a serving plate. Sprinkle with sesame seeds and sliced scallions. Serve immediately while the coating is at its crispiest.
Pro Tip
The key to crispiness is spacing. If your baking sheet is crowded, use two sheets. Crowded florets release steam that prevents browning.
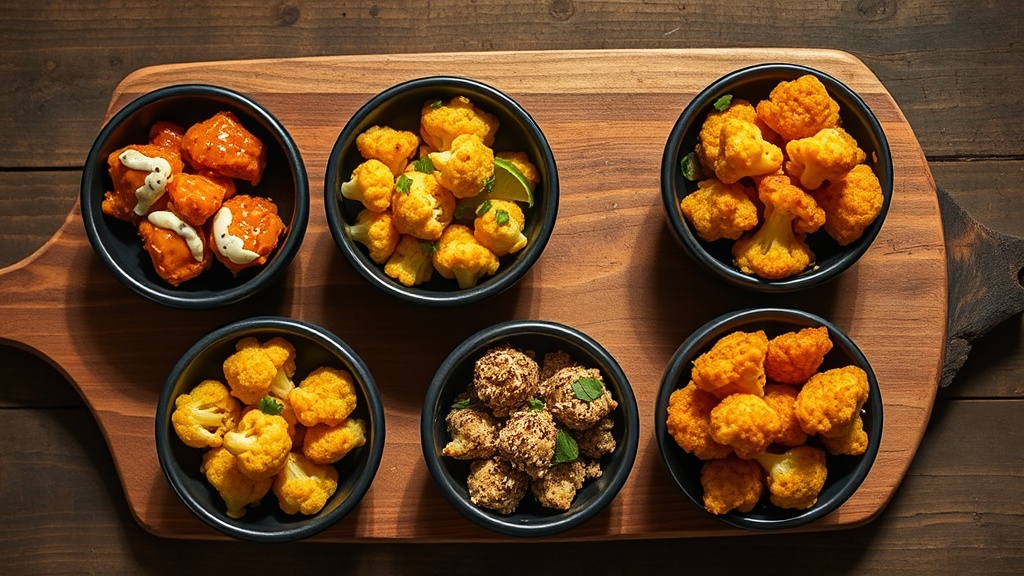
5 Flavor Variations
**1. Honey Garlic Buffalo Cauliflower:** Add 2-3 tablespoons of your favorite hot sauce (Frank's, Crystal) to the glaze. Serve with ranch or blue cheese dressing for dipping. These make incredible game-day appetizers.
**2. Honey Sesame Cauliflower:** Double the sesame oil to 2 teaspoons and add 1 tablespoon tahini to the glaze. Garnish with extra sesame seeds and a squeeze of lime. The nutty depth pairs beautifully with the honey-garlic base.
**3. Honey Curry Cauliflower:** Add 1 tablespoon curry powder and 1/2 teaspoon turmeric to the cornstarch coating before roasting. Use the standard honey garlic glaze. The warming spices transform this into an Indo-fusion side dish.
**4. Honey Garlic Parmesan Cauliflower:** Toss the glazed cauliflower with 1/4 cup freshly grated Parmesan immediately after coating. The cheese melts slightly into the sticky glaze, creating a savory-sweet umami crust.
**5. Air Fryer Honey Garlic Cauliflower:** Toss florets with oil and cornstarch as directed. Air fry at 400°F for 15-18 minutes, shaking the basket every 5 minutes, until crispy. Toss with glaze and serve. Faster than the oven with equally crispy results.
Serving Suggestions
Honey garlic cauliflower is versatile — it works as a side dish, appetizer, or plant-based main course.
- **Over steamed rice:** The classic pairing — rice absorbs the extra glaze for a satisfying bowl
- **As an appetizer:** Serve on a platter with toothpicks alongside ranch or sriracha mayo for dipping
- **In grain bowls:** Layer over quinoa or farro with avocado, pickled onions, and a drizzle of tahini
- **With honey garlic noodles:** Double the honey garlic flavor for an all-in plant-based dinner
- **Taco filling:** Load into tortillas with shredded cabbage, avocado cream, and lime — surprisingly delicious
- **Alongside protein:** Pair with honey garlic chicken or honey soy chicken for a complete meal
Tips for the Crispiest Cauliflower
Crispiness is everything in this recipe. Follow these tips for the best texture.
- **Dry the florets.** After washing, pat them completely dry with paper towels or spin in a salad spinner. Moisture is the enemy of crispiness.
- **Cut evenly.** Uniform florets cook at the same rate. Aim for 1.5 to 2-inch pieces.
- **Don't skip the cornstarch.** It creates a thin coating that absorbs the oil and crisps up in the oven. This is the same trick that makes honey garlic tofu and honey sesame chicken so crispy.
- **Use high heat.** 425°F is the sweet spot — hot enough for rapid caramelization, not so hot that the outside burns before the inside cooks.
- **Space the florets.** Single layer, not touching. Crowding creates steam pockets that prevent browning.
- **Glaze at the end.** Adding the sticky glaze before roasting would burn the sugars long before the cauliflower cooks through. Always roast first, glaze second.
Storage and Leftovers
While best served fresh, leftovers can be repurposed well.
- **Refrigerator:** 3-4 days in an airtight container. The coating will soften during storage.
- **Reheating:** Oven or air fryer at 375°F for 8-10 minutes to re-crisp. Avoid the microwave — it makes the coating soggy.
- **Repurpose ideas:** Chop leftover cauliflower and add to fried rice, stir into pasta, top flatbread, or stuff into wraps with fresh vegetables.
- **Freezing:** Not recommended. The cornstarch coating doesn't survive freezing well — it becomes mealy.
Nutrition Highlights
Cauliflower is a nutritional powerhouse — one cup provides 77% of your daily vitamin C, 20% of vitamin K, and 3 grams of fiber at just 27 calories. It's also one of the richest sources of sulforaphane, a compound with well-studied anti-inflammatory properties. Roasting actually increases the bioavailability of some of these nutrients by breaking down cell walls.
Pairing cauliflower with honey adds 30+ polyphenol antioxidants and prebiotic oligosaccharides (FOS/GOS) that support gut health. The garlic contributes allicin — activated when crushed or minced — which has documented antibacterial and cardiovascular benefits. Together, it's a surprisingly nutrient-dense dish.