Why Honey Garlic Wings Are Worth Making at Home
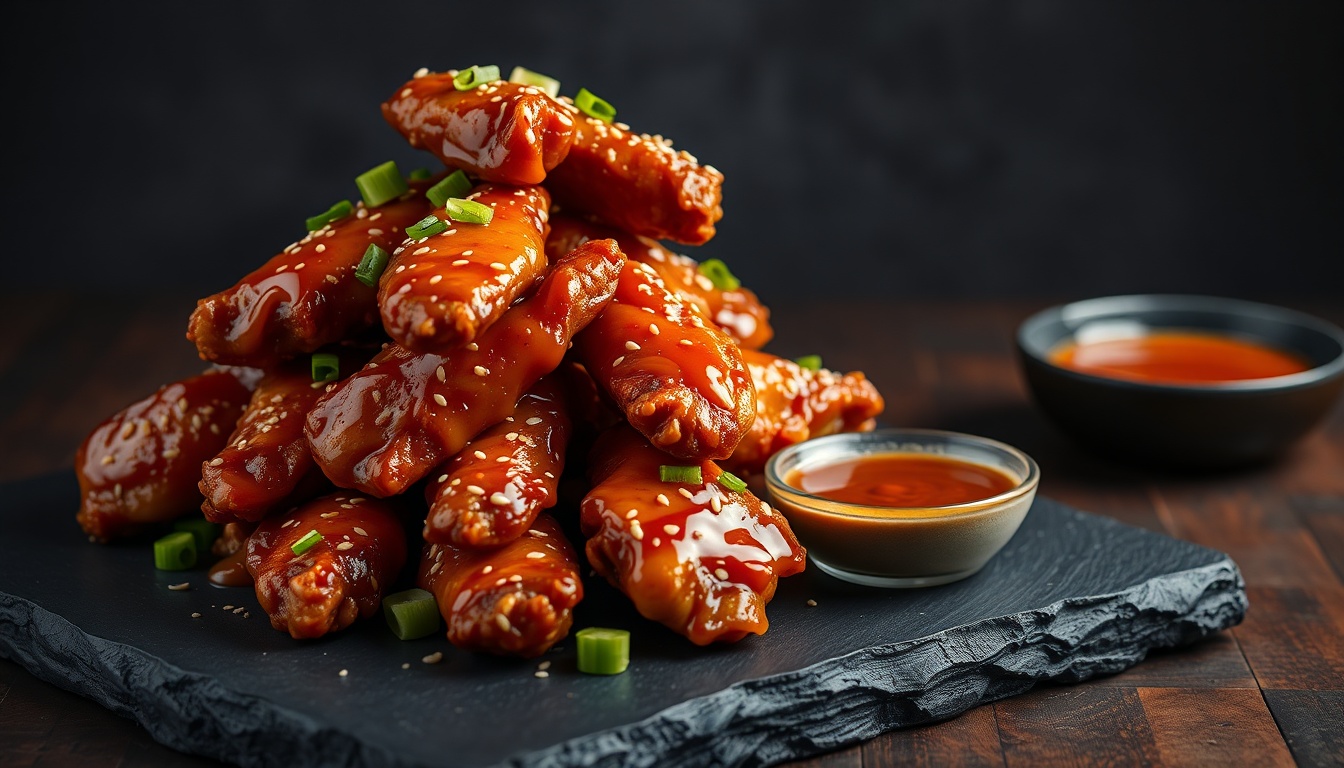
Honey garlic wings are one of the most popular wing flavors at restaurants and sports bars for good reason: the sticky, sweet-savory glaze caramelizes into a lacquered coating that makes every other wing flavor jealous. Making them at home means you control the quality of honey and can skip the deep fryer entirely.
The secret to crispy baked wings is simple: baking powder. A light coating of baking powder raises the skin's pH, which breaks down proteins faster during cooking and draws moisture to the surface where it evaporates. The result is skin that rivals deep-fried wings — shatteringly crisp on the outside, juicy inside.
Combined with a homemade honey garlic sauce that takes 5 minutes, these wings go from oven to table in under an hour. They're perfect for game day, weeknight dinners, or anytime you want restaurant-quality wings without the mess and calories of deep frying.
Choosing the Best Honey for Wings
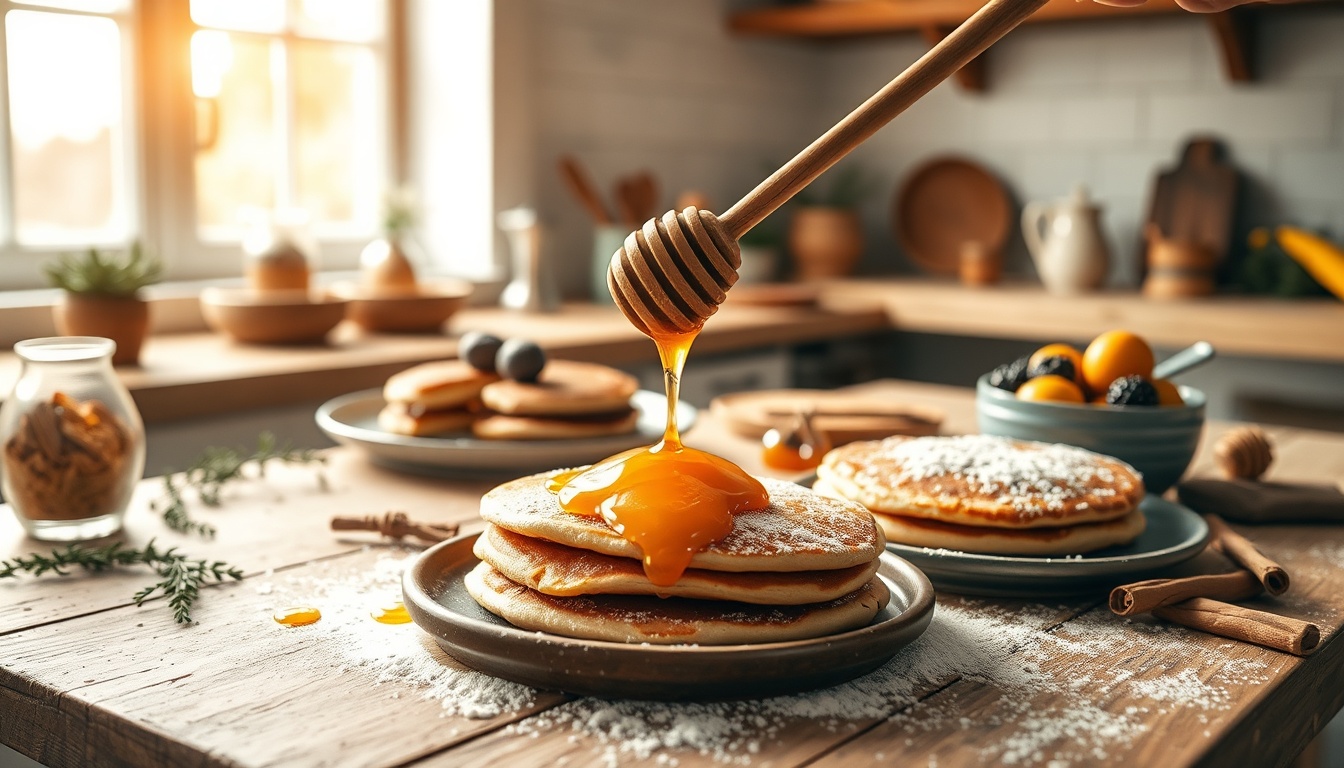
The honey you use directly affects the glaze's flavor, color, and caramelization. Since honey's fructose caramelizes at 230°F — much lower than table sugar — it creates a deeply golden, glossy coating with complex flavor notes.
- **Wildflower honey** — Our top pick. Multi-floral complexity produces the most interesting, layered glaze. Medium sweetness balances the garlic and soy perfectly.
- **Clover honey** — Clean, neutral sweetness that lets garlic and soy flavors dominate. The most crowd-pleasing, familiar option.
- **Buckwheat honey** — Bold, molasses-like depth that creates a darker, richer glaze with almost BBQ-like undertones. Outstanding for the smoky variation.
- **Orange blossom honey** — Subtle citrus brightness that lifts the glaze and pairs beautifully with the ginger variation.
- **Sourwood honey** — Buttery caramel notes with slight tang that add sophistication. A premium choice for special occasions.
Pro Tip
For an umami bomb, use fermented honey garlic in the sauce — the fermentation develops deep savory notes that make the glaze taste like you spent hours on it.
The Complete Recipe: Crispy Honey Garlic Wings
This recipe makes about 24 wing pieces (12 whole wings, separated into drumettes and flats) — enough for 4 as a main course or 6-8 as appetizers. Total time: 55 minutes.
Wing Ingredients
- 3 lbs (1.4 kg) chicken wings, separated into drumettes and flats, tips removed
- 1 tablespoon baking powder (not baking soda)
- 1 teaspoon salt
- 1/2 teaspoon black pepper
- 1/2 teaspoon garlic powder
Honey Garlic Glaze Ingredients
- 1/3 cup (115g) raw honey
- 3 tablespoons soy sauce (or tamari for gluten-free)
- 5 cloves garlic, minced
- 1 tablespoon rice vinegar
- 1 teaspoon sesame oil
- 1 tablespoon butter
- 1 tablespoon cornstarch + 2 tablespoons cold water (slurry)
- Optional: 1 teaspoon freshly grated ginger
Step-by-Step Instructions
**Step 1: Prep wings.** Pat wings completely dry with paper towels — this is critical for crispy skin. Toss wings with baking powder, salt, pepper, and garlic powder in a large bowl until evenly coated.
**Step 2: Bake.** Place wings on a wire rack set over a sheet pan (the rack allows air circulation for all-around crispiness). Bake at 425°F (220°C) for 45-50 minutes, flipping once at the 25-minute mark, until skin is golden and crispy.
**Step 3: Make the glaze.** In the last 10 minutes of baking, melt butter in a large skillet over medium heat. Add garlic and cook 30 seconds until fragrant. Add honey, soy sauce, rice vinegar, and sesame oil. Bring to a gentle simmer. Stir in cornstarch slurry and cook 1-2 minutes until the glaze thickens enough to coat the back of a spoon.
**Step 4: Toss.** Transfer crispy wings to the skillet. Toss gently but thoroughly, ensuring every wing is coated in the sticky glaze. Cook 1-2 minutes more — the residual heat from the wings helps the glaze set into a lacquered finish.
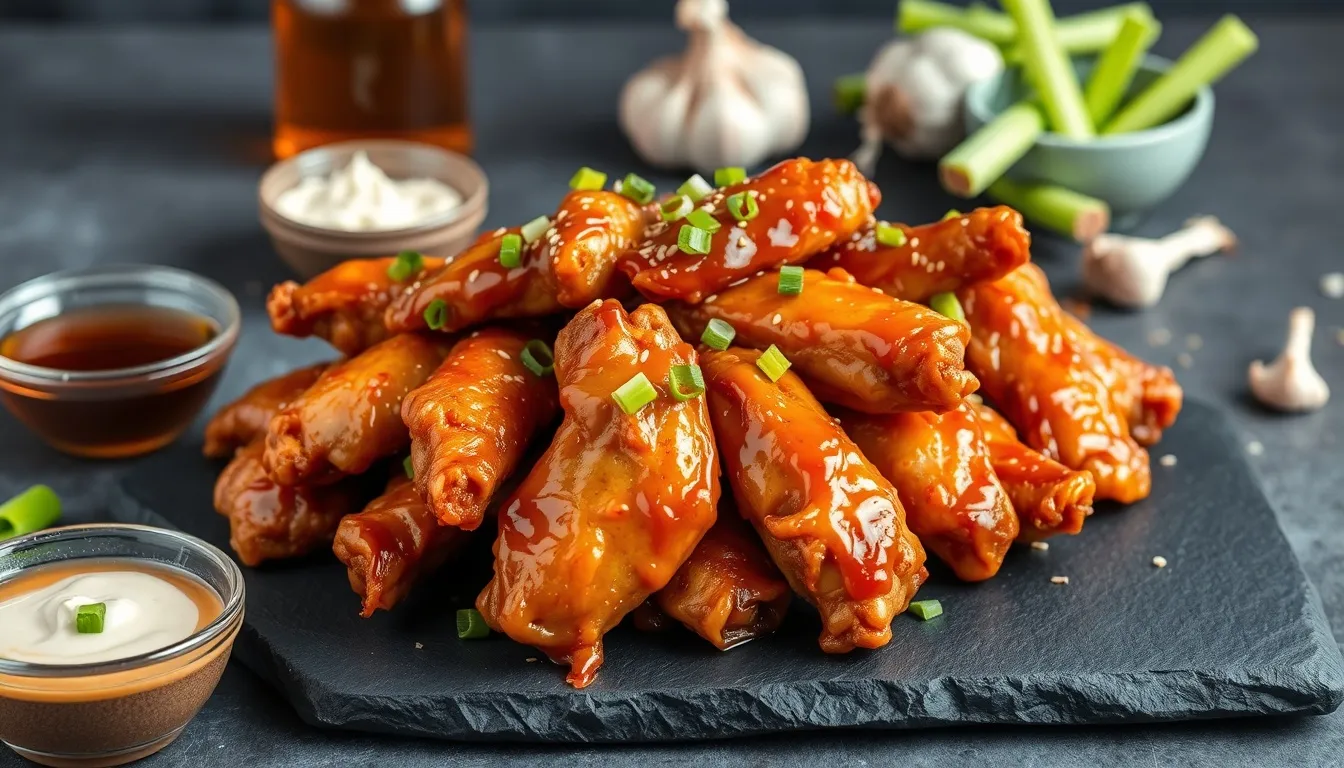
**Step 5: Serve.** Transfer to a platter. Garnish with sesame seeds, sliced green onions, and optional red pepper flakes. Serve immediately while the skin is still crispy under the glaze.
Pro Tip
The baking powder trick only works with aluminum-free baking powder. Regular baking powder can leave a metallic taste. Also, don't confuse baking powder with baking soda — baking soda will make the wings taste soapy and alkaline.
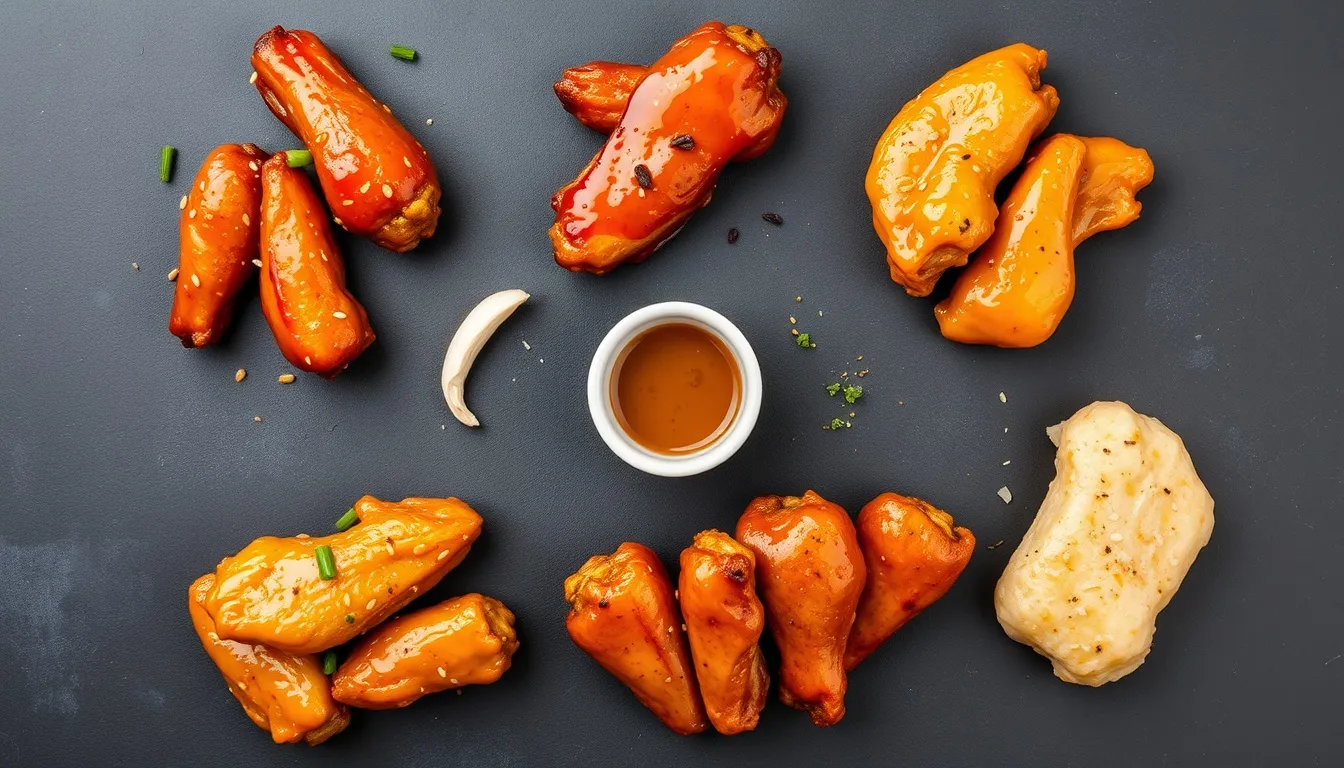
5 Glaze Variations
Each variation modifies the glaze while keeping the same crispy baked wing base. Mix and match for a wing platter with multiple flavors.
- **Honey Garlic Buffalo:** Add 3-4 tablespoons hot sauce (Frank's RedHot) to the base glaze for sweet-heat wings that combine the best of honey's caramelized depth with classic buffalo punch. Serve with blue cheese and celery.
- **Sticky Sesame Ginger:** Add 1 tablespoon grated fresh ginger, 1 extra teaspoon sesame oil, and 1 tablespoon toasted sesame seeds to the glaze. Lighter and more aromatic, inspired by honey and ginger pairings.
- **Smoky Honey BBQ:** Add 2 tablespoons tomato paste, 1 teaspoon smoked paprika, and 1/2 teaspoon cumin. Use buckwheat honey for maximum depth. Serve with honey cornbread and coleslaw.
- **Korean-Inspired Gochujang:** Replace soy sauce with 2 tablespoons gochujang + 1 tablespoon soy sauce. Add 1 teaspoon toasted sesame seeds. The fermented chili paste adds complex umami heat that pairs brilliantly with honey's sweetness.
- **Lemon Pepper Honey Garlic:** Add the zest and juice of 1 lemon plus 1 teaspoon coarsely cracked black pepper to the base glaze. Bright, peppery, and addictive — the citrus cuts through the richness.
Tips for the Crispiest Wings
The difference between good and great honey garlic wings comes down to texture. Here's how to guarantee crispy skin every time.
- **Dry the wings thoroughly.** Surface moisture is the enemy of crispiness. Pat each wing dry with paper towels before seasoning. For extra crispiness, place seasoned wings uncovered on the wire rack in the refrigerator for 1-4 hours before baking.
- **Use a wire rack.** Placing wings directly on a sheet pan traps steam underneath, creating a soggy bottom. The wire rack allows hot air to circulate around every surface.
- **Don't overcrowd.** Wings need space between them for air circulation. If they touch, they steam instead of roast. Use two sheet pans if necessary.
- **Flip once.** Flipping at the halfway point ensures even browning on both sides without disturbing the crisping process too frequently.
- **Toss in glaze at the last minute.** The glaze will soften the skin over time. Toss right before serving and eat within 15-20 minutes for peak crispiness.
Serving Ideas
Honey garlic wings work as the star of game day spreads, weeknight dinners, Father's Day cookouts, or party appetizers.
- **Classic game day platter:** Serve with celery, carrot sticks, blue cheese dip, and ranch. Add honey mustard as an alternative dipping sauce.
- **Over rice:** Drizzle extra glaze over steamed jasmine rice and top with wings for a complete meal.
- **Wing bowl:** Serve over a bed of shredded cabbage, pickled vegetables, and rice with extra glaze as a dressing.
- **Lettuce wraps:** Remove meat from bones and serve in butter lettuce cups with pickled onion, cucumber, and a squeeze of lime.
- **Party appetizer:** Arrange on a platter with toothpicks, dipping sauces, and napkins. Double the recipe for crowds of 10+.
- **Meal prep:** Wings reheat well. Store in the fridge for 3-4 days and reheat in a 375°F oven for 10 minutes to re-crisp the skin.
Make-Ahead and Storage
**Refrigerator (3-4 days):** Store glazed wings in an airtight container. Reheat on a wire rack in a 375°F (190°C) oven for 8-10 minutes — the skin won't be as crispy as fresh but will still be good. Avoid microwaving, which makes the skin rubbery.
**Freezer (up to 2 months):** Freeze baked wings without glaze on a sheet pan, then transfer to freezer bags. Reheat from frozen at 400°F for 15-20 minutes, then toss with freshly made glaze. Always make the glaze fresh — it takes only 5 minutes and freezing dulls the garlic flavor.
**Party prep:** Bake wings up to 4 hours ahead and hold at room temperature. Reheat at 425°F for 5-8 minutes to re-crisp, then toss with warm glaze right before serving.
Honey's natural hygroscopic properties help the glaze retain moisture, keeping the meat juicier during storage than sugar-based sauces.
Common Mistakes and Fixes
- **Wings aren't crispy:** Almost always caused by not drying the wings thoroughly or skipping the baking powder. Pat them dry twice and make sure baking powder coats every piece evenly.
- **Skin is burnt but meat is raw inside:** Oven temperature too high or wings are too large. Use an instant-read thermometer — internal temperature should reach 165°F (74°C). If skin browns too fast, tent loosely with foil.
- **Glaze slides off:** The glaze needs to be thick enough to cling. If it's too thin, simmer it another 2-3 minutes or add a second cornstarch slurry (1 teaspoon cornstarch + 1 tablespoon water).
- **Garlic burns in the sauce:** Garlic goes from golden to bitter in seconds. Keep heat at medium, stir constantly, and add the liquid ingredients quickly after the garlic becomes fragrant.
- **Wings taste like baking soda:** You used baking soda instead of baking powder. They are different products. Use aluminum-free baking powder only.